Exploring the world of caramel apples is like entering a whimsical autumnal fairytale, reminiscent of the vibrant, diverse ecosystems supported by agriculture, where the crisp, cool air mingles with the rich, buttery scent of molten caramel, mirroring the golden hues of fall in the glossy coating around juicy apples. To understand the agricultural significance of apples, a fundamental component of this treat, the Food and Agriculture Organization of the United Nations offers insights into sustainable agriculture and food systems. This delightful confection, a harmonious blend of the tartness of the apple with the sweet, creamy decadence of caramel, has been a festive favorite for generations, symbolizing the essence of fall and the joyous celebrations it brings.
However, crafting the perfect caramel apple is more than just a dip into sweetness; it’s an art form, a delicate dance of flavors, textures, and techniques that, when mastered, creates not just a treat, but an experience. In this comprehensive guide, we’ll embark on a journey through the orchard of knowledge, from selecting the ideal apple to the final, satisfying crunch of that first bite, ensuring that your caramel apples are nothing short of spectacular.
The Joy of Making Caramel Apples
The allure of caramel apples lies not just in their irresistible flavor but in the sheer joy of their creation. A tradition that many look forward to as the leaves start to turn, making caramel apples is an activity that unites friends and family in a shared experience of culinary creativity. It’s a chance to get hands-on in the kitchen, to laugh over sticky fingers, and to personalize each apple with a variety of toppings that cater to every palate.
A Nod to Tradition: The History and Significance
But before we delve into the nuances of caramel-making and apple-dipping, let’s take a moment to appreciate the rich history and cultural significance of this beloved treat. The caramel apple originated in the early 20th century, a happy accident of experimentation that has since evolved into a symbol of autumn’s bounty and festive spirit. Today, they are a staple at fall festivals, Halloween parties, and Thanksgiving feasts, serving as a bridge between the summer’s end and the cozy embrace of winter.
Crafting the Perfect Caramel Apple: A Guide
As we gear up to create these delectable delights, it’s essential to remember that the foundation of a great caramel apple is, unsurprisingly, the apple itself. The choice of apple can make or break your caramel apple experience, influencing not just the taste but the overall integrity of the treat. In the following sections, we’ll guide you through selecting the perfect apple, preparing it for its caramel bath, and ensuring that your caramel adheres flawlessly, setting the stage for a caramel apple that’s as beautiful to look at as it is to eat.
Shelf Life: Savoring Your Creation
So, let’s roll up our sleeves, gather our ingredients, and embark on this sweet adventure. And as we do, let’s ponder a question that often arises: How long does a cut caramel apple last? The answer, as we’ll discover, lies in the delicate balance of preparation, preservation, and, of course, the irresistible temptation to devour it at the first opportunity.
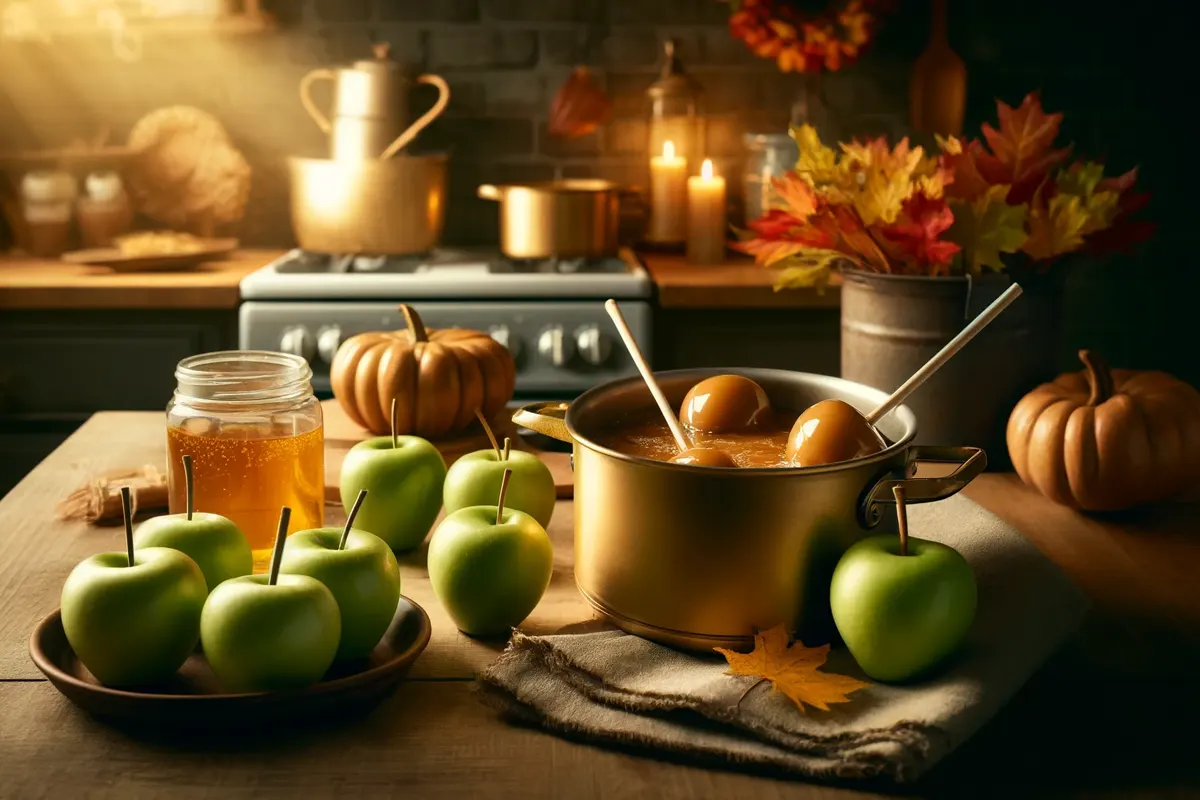
Selecting the Perfect Apples for Caramel Coating
When it comes to making caramel apples, the apple itself is not just a vehicle for the caramel; it’s a crucial component that contributes to the overall symphony of flavors and textures. Thus, picking the right apple is paramount. It’s like choosing the perfect partner for a dance; the right match can elevate the performance, while the wrong one can lead to a less harmonious outcome.
The Ideal Apple Varieties
The apple variety you choose should strike a balance between tartness and sweetness, firmness and juiciness. Among the most popular choices are Granny Smith and Honeycrisp apples. The Granny Smith, with its vibrant green skin and tart flavor, provides a delightful contrast to the sweet, buttery caramel. On the other hand, Honeycrisp apples, known for their crisp texture and balanced sweetness, offer a different but equally pleasing experience.
Key Selection Criteria
When selecting your apples, consider these pointers:
- Look for Freshness: The fresher the apple, the crisper and juicier it will be. Fresh apples also hold up better to the dipping and cooling process, ensuring your caramel apples look as good as they taste.
- Check for Firmness: Gently press the apple; it should feel firm, with no soft spots. A firm apple not only supports the weight of the caramel and toppings but also provides that satisfying crunch.
- Inspect for Bruises: Avoid apples with visible bruises or blemishes. Imperfections can affect the apple’s texture and might lead to uneven caramel coating.
Embrace Experimentation
Remember, the beauty of making caramel apples lies in the customization. While Granny Smith and Honeycrisp are excellent starting points, don’t be afraid to experiment with other varieties. Each apple brings its unique flavor and texture to the table, allowing you to create a caramel apple that’s truly your own.
Now that you’ve selected the perfect apples, the next step is preparing them for their caramel makeover. This involves more than just a quick rinse; it’s about ensuring the apple’s surface is primed for the caramel to adhere seamlessly, creating a perfect canvas for your culinary artistry. Stay tuned as we delve into the art of preparing your apples for a flawless caramel coating.
Preparing Your Apples for Caramel
With the perfect apples in hand, it’s time to prep them for their transformation into delectable caramel delights. This stage is crucial, as proper preparation can significantly impact the caramel’s ability to cling to the apple, ensuring a smooth, even coating that’s as delightful to bite into as it is to behold.
Cleaning and Drying
First things first, your apples need a thorough cleaning to remove any wax or residue that might prevent the caramel from adhering properly. A quick dunk in boiling water for a few seconds can do the trick—just enough to melt away the wax without cooking the apple. After their bath, give the apples a good wipe with a clean towel to ensure they’re completely dry. Any moisture left on the apple can create a barrier between the fruit and the caramel, leading to potential slippage or uneven coating.
Inserting Sticks
Once your apples are dry, it’s time to give them a handle. Inserting a stick into each apple not only makes them easier to dip and eat but also adds to their classic caramel apple appearance. Choose a sturdy stick, like a popsicle stick or a clean twig for a rustic look, and insert it firmly into the top of the apple, where the stem used to be. Make sure it’s secure; this stick has to support the weight of the apple and the added heft of the caramel and any toppings.
Chilling Apples
Finally, a little chill time is in order. Placing the apples in the refrigerator to cool makes the caramel set faster when you dip them, ensuring a thick, even layer that won’t run off the apple. Cold apples can also help prevent the caramel from overheating, which can affect its texture and flavor.
With your apples cleaned, dried, sticked, and chilled, they’re now primed for their caramel bath. This preparation phase is the foundation upon which your caramel apple masterpiece will be built, ensuring that the caramel not only looks spectacular but also holds up to that first, eagerly anticipated bite.
As we move forward, the excitement builds. The stage is set, and it’s almost time to bring on the caramel—the star of the show. Stay tuned as we dive into the art of crafting the perfect caramel, a process where patience and precision blend to create the ultimate sweet coating for your carefully prepared apples.
The Art of Caramel Making
Ah, caramel! This golden, sticky concoction is where the magic truly happens, transforming a simple apple into a mouthwatering treat. Crafting the perfect caramel is an art form that requires a blend of patience, precision, and a touch of whimsy. Let’s delve into the alchemy of turning basic ingredients into a luscious coating fit for your pristine apples.
Ingredients Overview
The journey to perfect caramel begins with a simple palette of ingredients, each playing a vital role in achieving that rich, buttery flavor and silky texture. At its core, caramel is a dance of sugar and cream, with a pinch of salt to balance the sweetness and a dash of vanilla for aromatic depth. Quality matters here, as each ingredient contributes to the final taste and texture of your caramel.
- Granulated sugar is the backbone, melting down into a golden amber liquid that forms the base of your caramel.
- Water acts as a medium, helping the sugar dissolve evenly and preventing clumping.
- Heavy cream brings in the luxurious richness, transforming the melted sugar into a creamy delight.
- Vanilla extract adds a layer of complex flavor, elevating the caramel from simply sweet to gourmet.
- A pinch of kosher salt cuts through the sweetness, enhancing the overall flavor profile.
Step-by-Step Caramel Cooking Process
Making caramel is akin to conducting an orchestra, where timing and attention to detail are key. Here’s how to orchestrate your caramel to perfection:
- Begin with a heavy-duty saucepan, combining the sugar, water, and salt over medium heat. Stir gently until the sugar dissolves, and watch as the mixture starts to bubble.
- As the mixture heats, resist the urge to stir. Instead, swirl the pan occasionally to ensure even heating. The mixture will start to turn golden, an indication that your caramel is coming to life.
- Once the desired amber hue is achieved, it’s time for the grand finale: carefully pour in the heavy cream. The mixture will bubble vigorously—fear not, for this is part of the caramel’s dramatic transformation.
- Continue to cook, stirring constantly, until the caramel reaches the perfect consistency, thick enough to coat the back of a spoon but still pourable.
Troubleshooting Common Caramel Issues
Even the most experienced caramel artisans can encounter hiccups. If your caramel starts to crystallize, don’t despair. Gently heat the mixture, stirring slowly, to dissolve any sugar crystals. If the caramel seems too thin, a little more cooking time can coax it into a thicker state. Conversely, if it’s too thick, a splash of cream can loosen it up.
With your perfect caramel ready, it’s almost time to bring together the fruits of your labor. The apples, prepped and chilled, await their transformation. As you dip each apple into the golden pool of caramel, you’re not just making a treat; you’re crafting a memory, a moment of joy that’s as sweet and fleeting as the season itself. So, let’s proceed with anticipation to the next stage, where your apples will finally meet their caramel destiny.

Dipping Apples in Caramel and Adding Toppings
The stage is set, the apples are prepped, and your homemade caramel is at just the right consistency. It’s time for the main event: dipping the apples to cloak them in a glossy, golden layer of caramel. But why stop there? This is also your moment to unleash your creativity, adorning your apples with a myriad of toppings that add texture, color, and an extra layer of flavor. Let’s dive into the art of dipping and decorating, transforming your apples into not just a treat, but a masterpiece.
Dipping Techniques
Dipping your apples in caramel is not just about submerging and removing them; it’s a delicate process that ensures an even, smooth coat. Here’s how to achieve that perfect caramel embrace:
- Ensure your caramel is warm but not hot, maintaining a fluid consistency that’s neither too runny nor too thick.
- Hold an apple by the stick and gently dip it into the caramel, tilting and rotating it to cover all sides. The cold apple from the fridge will help set the caramel quickly.
- Let the excess caramel drip off by gently swirling the apple or lightly tapping it against the side of the saucepan. This step is crucial for achieving that smooth, even coat without excess pooling at the bottom.
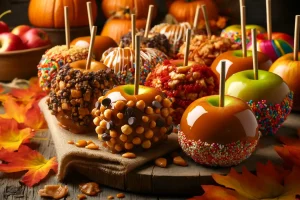
Creative Topping Ideas
Once dipped, the real fun begins. While the caramel is still tacky, roll or sprinkle your apples with a variety of toppings to suit any taste. Here are some ideas to spark your creativity:
- Chopped nuts (pecans, almonds, or peanuts) add a crunchy contrast to the soft caramel.
- Mini chocolate chips or drizzled melted chocolate create a decadent double treat.
- Crushed cookies or candy pieces introduce fun textures and flavors.
- Sprinkles or colored sugar can match any theme or occasion, making your caramel apples festive and eye-catching.
Setting and Storing
Once decorated, place your apples on a parchment-lined baking sheet to set. The caramel will firm up, securing the toppings in place. If you’re not serving them immediately, you can wrap the apples in cellophane or store them in an airtight container in the fridge. Remember, the joy of a caramel apple is in its freshness, so they’re best enjoyed within a few days of making them.
Creating caramel apples is more than just a culinary activity; it’s an expression of creativity, a labor of love that brings joy and sweetness to any occasion. Whether you’re making them for a festive gathering, as a fun family activity, or simply to indulge in a sweet treat, the process of dipping and decorating caramel apples is as rewarding as savoring the final product.
With your caramel apples dipped and adorned, ready to dazzle and delight, it’s time to move on to the final touches. How will you present these beauties? How will you ensure they’re as enjoyable to eat as they were to make? Stay tuned as we explore the best ways to serve and savor your homemade caramel apples, ensuring every bite is as memorable as the last.
How to Serve and Enjoy Caramel Apples
The moment has arrived to unveil your caramel apple creations, each a testament to your culinary craft and artistic flair. But before the first bite, consider the presentation and serving of these delightful treats. After all, part of the joy lies in the anticipation, the visual feast that precedes the taste. Here’s how to ensure your caramel apples are not just delicious, but also a joy to serve and eat.
Cutting Techniques
While biting into a whole caramel apple is a classic experience, it can be daunting for some, especially for kids or at elegant gatherings. Cutting the apples into slices makes them more accessible and easier to enjoy. Here’s the optimal way to slice your caramel apples for serving:
- Chill the caramel apples briefly before cutting; this helps maintain the integrity of the caramel layer.
- Use a sharp knife to slice the apple into wedges, starting from the base and working around the stick. If the caramel begins to stretch or pull, a brief dip of the knife in hot water can ease the slicing process.
- Arrange the slices on a platter, fanning them out from the stick, to create an appealing display that invites guests to help themselves.

Pairings and Presentation
Serving caramel apples is an opportunity to get creative with pairings and presentation, enhancing the overall experience. Consider these ideas:
- Cheese and Fruit Platter: Pair slices of caramel apple with an assortment of cheeses, nuts, and other fruits for a sophisticated twist on a classic cheese board.
- Dessert Bar: Include caramel apples or slices as part of a larger dessert spread, allowing guests to indulge in a variety of sweets.
- Individual Portions: For a personal touch, serve sliced caramel apples in individual cups or on small plates, drizzled with extra caramel or chocolate sauce for added decadence.
Remember, the presentation of your caramel apples can be as simple or elaborate as the occasion calls for. Whether you’re hosting a fall party, a Halloween bash, or simply enjoying a cozy night in, the way you serve your caramel apples can elevate the experience, making it memorable for all involved.
As you prepare to share your caramel apple creations, relish the smiles and delight they bring to those around you. The act of serving and enjoying these treats is a celebration of the season, a shared moment of sweetness that encapsulates the essence of autumn. So, gather your loved ones, serve up your masterpieces, and bask in the joy of the season, one delicious caramel apple slice at a time.
Frequently Asked Questions About Caramel Apples
Caramel apples, with their glossy coats and sweet-tart balance, are a treat that sparks curiosity and delight. As with any culinary endeavor, questions often arise, especially for those embarking on their caramel apple journey for the first time. Let’s address some common inquiries to ensure your caramel apple making experience is as smooth as the caramel itself.
How long do caramel apples last?
This is a question that often comes up, particularly if you’re making a batch of caramel apples for an event or as gifts. The lifespan of a caramel apple can vary depending on a few factors, such as how it’s stored and whether it’s been cut. Generally, whole caramel apples can last in the refrigerator for up to a week, with the caramel acting as a barrier to keep the apple fresh. However, once cut, it’s best to consume them within 24 hours to enjoy the freshest taste and texture, as the exposed apple can start to oxidize and soften.
Can caramel apples be frozen for later use?
Freezing caramel apples is not recommended. The process can alter the texture of both the apple and the caramel, leading to a less than desirable eating experience upon thawing. The moisture content in apples and the sugar structure in caramel can change significantly in the freezer, affecting their integrity. For the best quality, enjoy your caramel apples fresh or store them in the refrigerator if you need to keep them for a few days.
How to prevent caramel from sliding off the apples?
A common challenge in the caramel apple-making process is ensuring the caramel sticks to the apple without sliding off. Here are a few tips to help prevent this:
- Remove Wax: Thoroughly clean your apples to remove any wax coating, which can prevent the caramel from adhering properly. A quick dip in boiling water, followed by a thorough drying, usually does the trick.
- Chill the Apples: Refrigerate your apples before dipping them in caramel. The cool temperature of the apples helps the caramel set more quickly upon contact, reducing the chances of it sliding off.
- Proper Caramel Consistency: Make sure your caramel is at the right temperature and consistency. If it’s too hot or too thin, it might not stick as well. Aim for a warm, slightly thickened caramel that’s cooled from its boiling point but still fluid.
Creating the perfect caramel apple might come with its set of questions and challenges, but with a bit of know-how and some culinary curiosity, you can turn this festive treat into a delightful tradition. Whether you’re a seasoned pro or a first-time maker, each batch is an opportunity to refine your technique, experiment with flavors, and, most importantly, create joyous moments and sweet memories.